Institution of an automatic out-of-office message
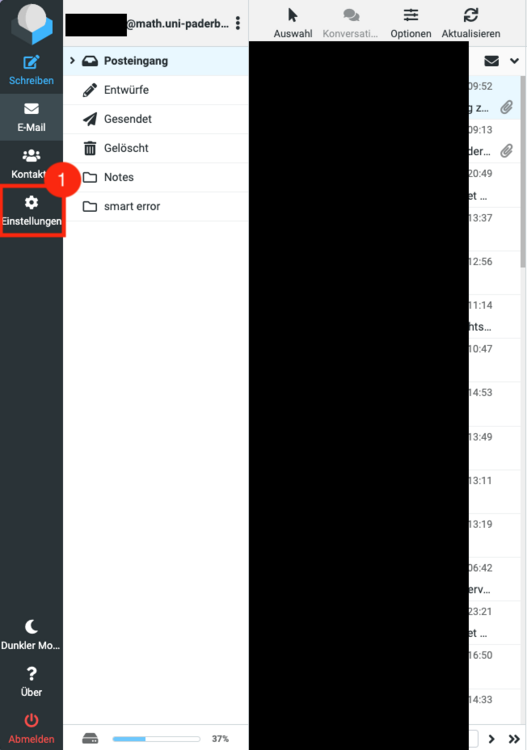
You can set up an out-of-office message in the filter menu in the webmailer. To do this, please log in to the webmailer and select Settings in the menu on the left
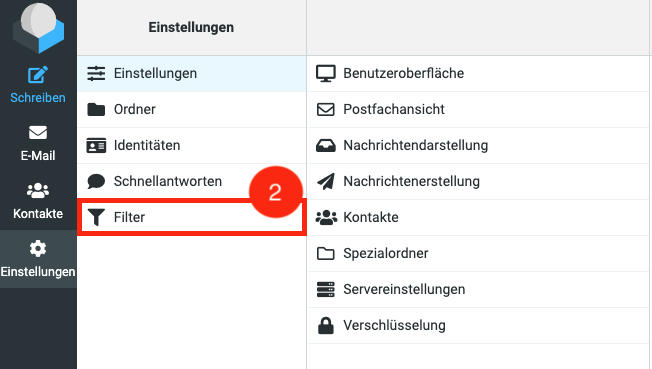
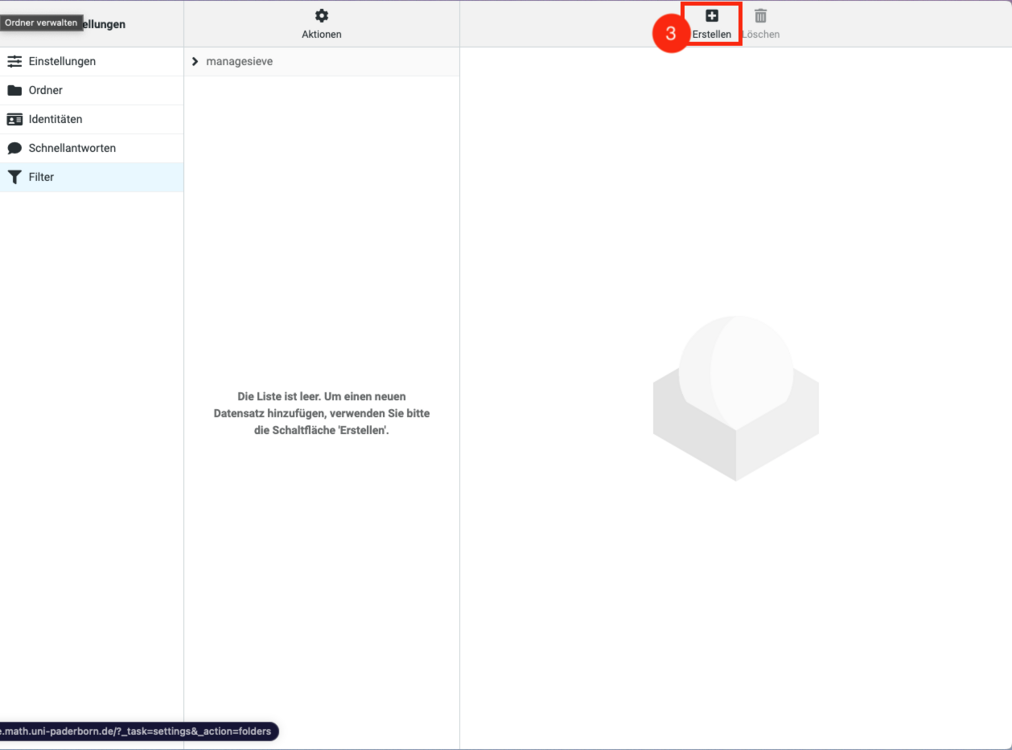
If you now click on the "Filter" entry (step 2), you can add new filters under Create (step 3). (Fig. 2 and Fig. 3)
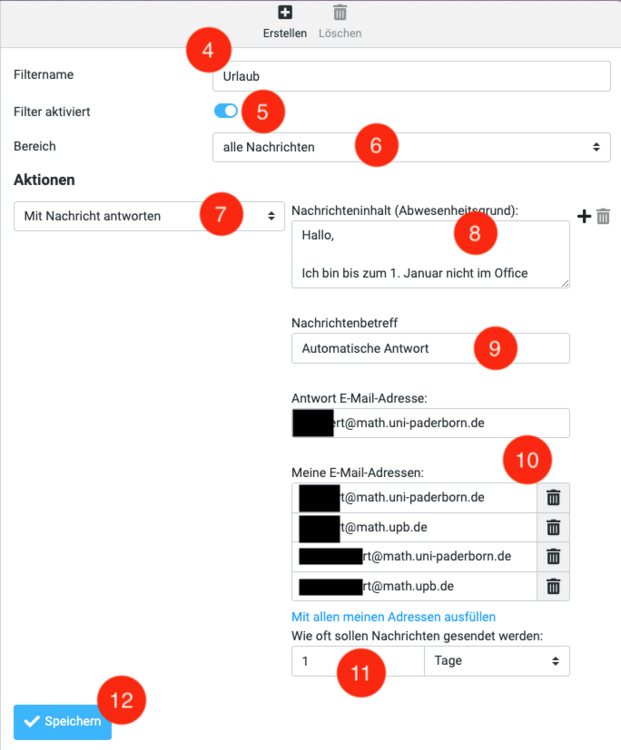
4. specify a name for the filter. This will only be displayed to you.
5 Activate the filter
6. if an out-of-office message is to be applied to all messages, set the All messages option under Field. Alternatively, you can also define only certain sender addresses.
7. under Actions, select Reply with message.
8. enter your out-of-office message in the message content.
9. then define a subject.
10. under My email addresses, click Fill in with all my addresses.
11) Set the value for Frequency to 1 day(s ) [Recommended].
12. save the filter.
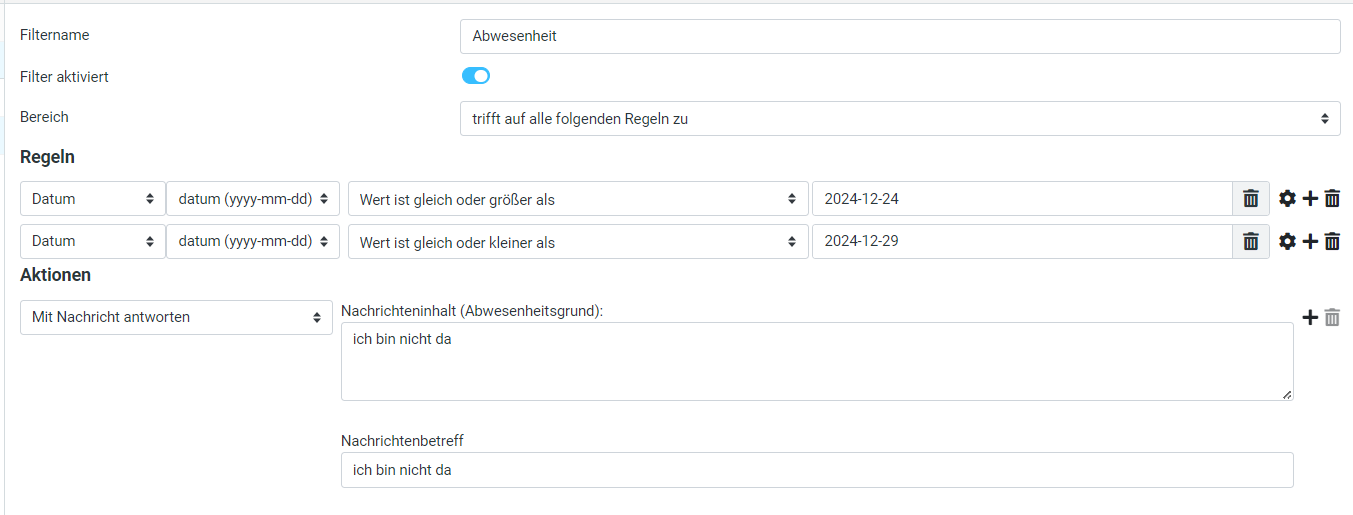
If you want to have a time limit for your absence, add the following two filter rules as shown in the picture.
Remarks
Please note that only one absence filter rule may be defined.
If several absence filter rules have been defined, the absence note will unfortunately not work.
This also applies if one of the absence filter rules is deactivated.
Please do not use a Gmail account to test the out of office note, as Google unfortunately does not accept automatic replies generated by Roundcube.
Abwesenheitsnotiz im Serviceportal
Die einfachste Art eine Abwesenheitsnotiz zu aktivieren funktioniert über das serviceportal.uni-paderborn.de .
Sie könnnen dort unter "Benutzereinstellungen" den Punkt "E-Mail-Einstellungen" auswählen. Drücken Sie dort den Button "Abwesenheitsbenachrichtigung aktivieren". Im erscheinenden Editorfenster können Sie dann den Text eingeben. Nach Druck auf "Speichern" ist die Abwesenheitsnotiz aktiv. Mittels "Deaktivieren" können Sie die Notiz wieder abschalten. Eine Zeitsteuerung ist leider nicht möglich.

